Creating an SMS campaign
Now that all the basic steps have been completed, you can create your campaign for sending SMS messages.
You can do this by clicking the “Create New Campaign” (1) button, which will appear on the home page once you have completed the basic account setup steps.

When you open the first page of the campaign creation process, you will need to choose one of the following options: use an existing recipient list or create a new one.

If you choose to use an existing list, you can enter the name of your campaign and select the desired recipient list from your existing lists.
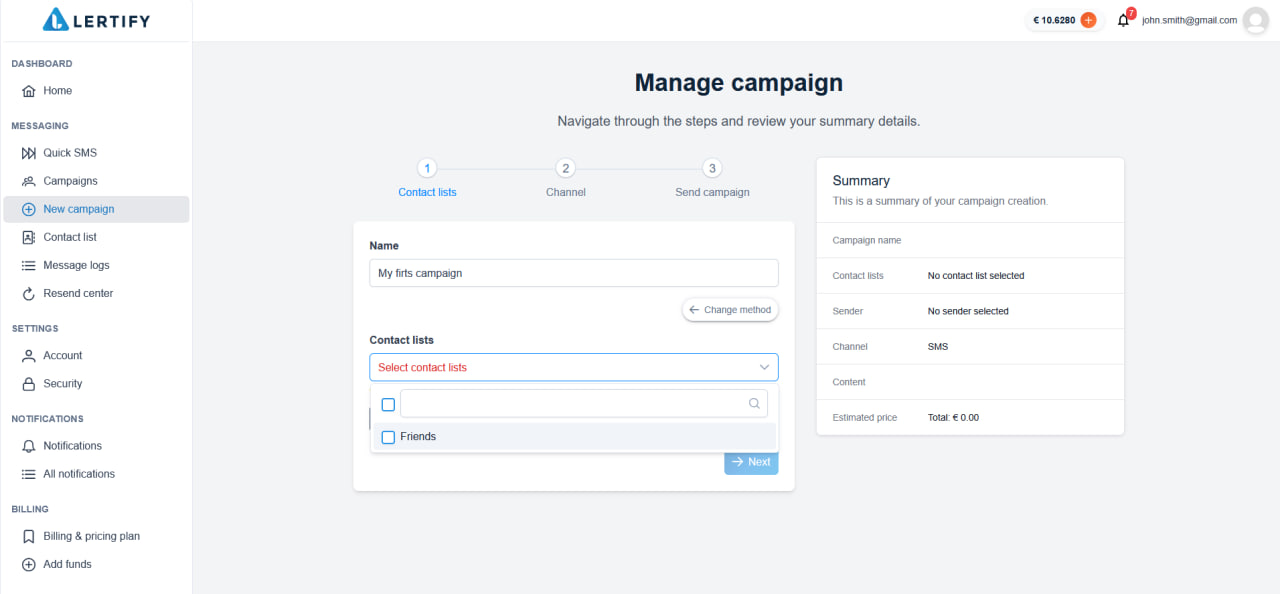
If you choose to create a new list, follow the instructions to enter the phone numbers and create a new recipient list.
! Important: Make sure that the selected country matches the country calling code of the entered phone numbers.

After successfully entering the phone numbers, a notification confirming that the contacts have been imported successfully will appear. You will then be automatically redirected to the next step of the campaign creation process.
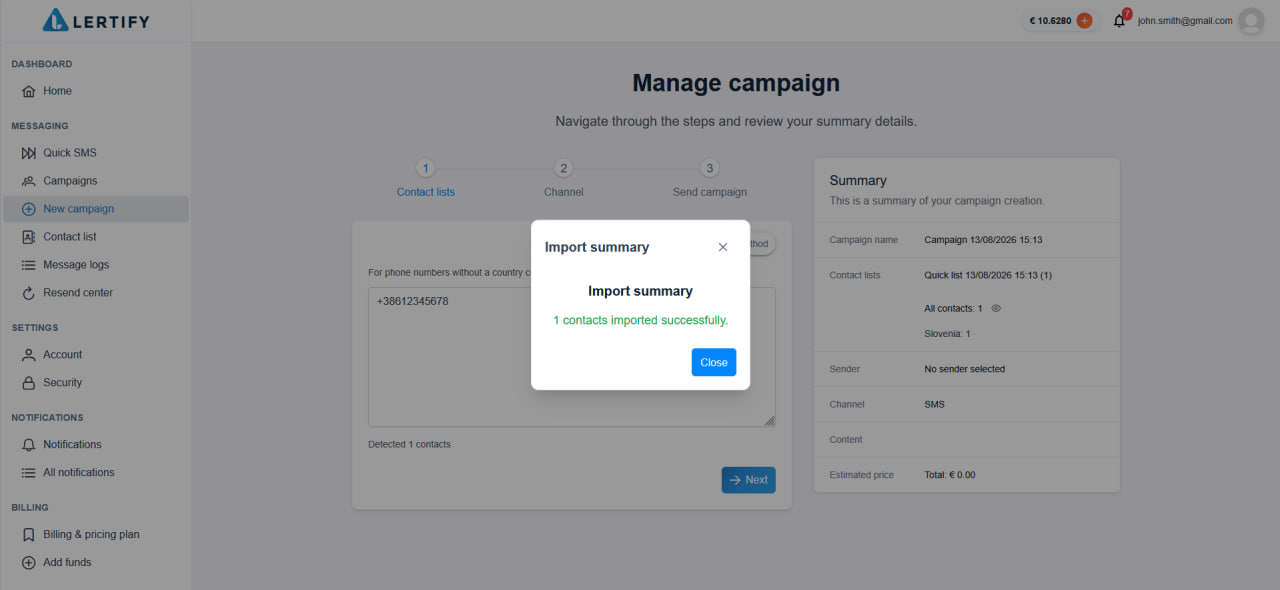
If you enter an invalid phone number or if its country calling code does not match the selected country, an error message will be displayed.

Next, select a sender from the existing senders or add a new one (1), and choose the messaging method — SMS or Viber (2).
Enter the message text in the “Content” field (3). This is the message that will be received by the recipients. You can use two text encoding methods: GSM-7 and UCS-2.
GSM-7 and UCS-2 are text encoding methods used for SMS messages.
- GSM-7 is the standard encoding for common characters (Latin letters, numbers, and most symbols). It allows up to 160 characters in a single SMS message.
- UCS-2 is used for characters that are not included in GSM-7 (such as Cyrillic, Arabic, and Chinese characters, as well as emojis). With this encoding, a single SMS message can contain up to 70 characters.
If your message contains at least one character that is not supported by GSM-7, UCS-2 encoding will be applied automatically. Otherwise, you can manually change the encoding method using the corresponding option (4). Click the “Next” button.

Next, you can choose whether to send the message immediately or at a specific date and time.
To send the message immediately, click the “Send Now” button. To send it at a specific date and time, select the desired time and click the “Send at Selected Time” button.
